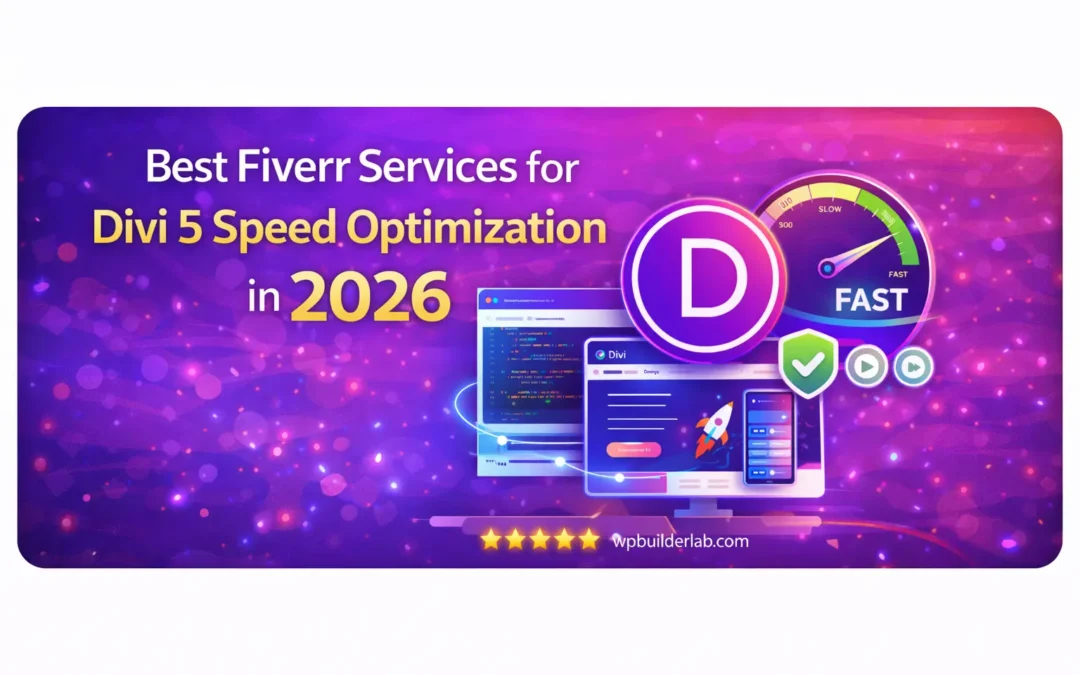
Divi 5 has changed the conversation around Divi performance. Elegant Themes officially ended the beta on February 26, 2026, and says sites using legacy Divi 4 modules stay in backward-compatibility mode, which means they won’t fully benefit from Divi 5’s performance improvements until they are migrated.
That creates a clear opportunity for site owners: if your Divi website feels slow, a Fiverr freelancer who understands Divi 5 migration, cleanup, and speed optimization can save you a lot of time.
Fiverr already has active demand and listings for Divi services, including gigs specifically mentioning Divi 5 migration and speed optimization.
In this guide, I’ll show you what Divi 5 speed optimization means, what to look for in a Fiverr seller, and how to choose the right service for your website.
Why Divi 5 speed optimization matters
Divi 5 is not just a visual refresh. Elegant Themes says Divi 5 was rebuilt on a modern foundation with Flexbox, CSS Grid, nested rows, design variables, and a cleaner architecture. That matters because performance work is easier when the builder itself is more modern and structured.
But there is an important catch.
If your site still relies on older Divi 4 modules, backward compatibility can limit how much benefit you get from Divi 5’s new performance improvements. In many cases, “speed optimization” is not just caching or image compression. It may also include migration, layout cleanup, module replacement, and reducing legacy code dependencies.
That is exactly why this topic has strong Fiverr affiliate potential: people searching for Divi 5 speed optimization usually have a real problem and a reason to hire someone now.
What Fiverr services usually include
When you look for Divi 5 speed optimization on Fiverr, the best gigs usually combine several tasks instead of only promising “faster speed.”
A good service may include:
Divi 5 migration or cleanup
removal of unnecessary plugins
image compression and next-gen image setup
CSS and JavaScript reduction
layout/module cleanup
mobile performance fixes
cache and CDN configuration
Core Web Vitals improvements
database cleanup
hosting-level recommendations
Fiverr’s Divi category and related gig pages already show sellers offering Divi website work, Divi page builder fixes, Divi developer services, and even direct Divi 5 migration plus speed optimization.
If your site is already losing leads because of slow loading, hiring a specialist can be cheaper than spending days testing plugins and settings yourself.
Best Fiverr service angles to include in your article
For stronger affiliate conversions, structure your post around service types instead of only “top sellers.” That makes the article more useful and less dependent on one gig ranking.
You can create sections like these:
Best for full Divi 5 migration and speed cleanup
Ideal for older Divi sites moving into Divi 5.
Best for Core Web Vitals improvements
Good for bloggers, agencies, and SEO-focused sites.
Best for WooCommerce performance
Strong buying intent because store speed affects conversions.
Best for mobile speed optimization
Useful for affiliate pages and landing pages where most traffic is mobile.
Best budget-friendly Divi speed fix
Good for small site owners who only need one or two pages optimized.
Suggested buying questions for readers
Add a section telling readers to message sellers with these questions before ordering:
Do you optimize specifically for Divi 5?
Will you check whether my site is still using legacy Divi 4 modules?
Do you include mobile speed optimization?
Will you optimize images, scripts, and plugins?
Do you provide a before-and-after report?
Can you help with caching and CDN setup?
Have you optimized Divi WooCommerce sites before?
That section helps conversions because it reduces buyer uncertainty.
My recommendation
If you are writing for Fiverr affiliate income, this topic is strong because it sits at the intersection of three things:
a fresh product shift: Divi 5 is newly official
real service demand: Fiverr already has active Divi and Divi 5 gigs
buyer intent: “speed optimization” searches usually come from people who want a fix, not just information
Fiverr’s affiliate program also remains attractive for this kind of content, with commission terms described as a percentage of the first order and a share of future orders within the first 12 months, depending on product type.
That makes posts like this much better for earnings than broad informational content.
“Best Fiverr Services for Divi 5 Speed Optimization” is a smart affiliate topic because it is specific, timely, and tied to a real business problem.
Divi 5 is new enough that many site owners still need help migrating, cleaning up legacy builds, and improving performance. Fiverr already has sellers offering Divi 5-related services, which means you can create a practical buyer’s guide that matches what people are actively looking for.
If you write this article well, focus on real buyer questions, and compare service types clearly, it has strong potential to bring both search traffic and affiliate clicks.
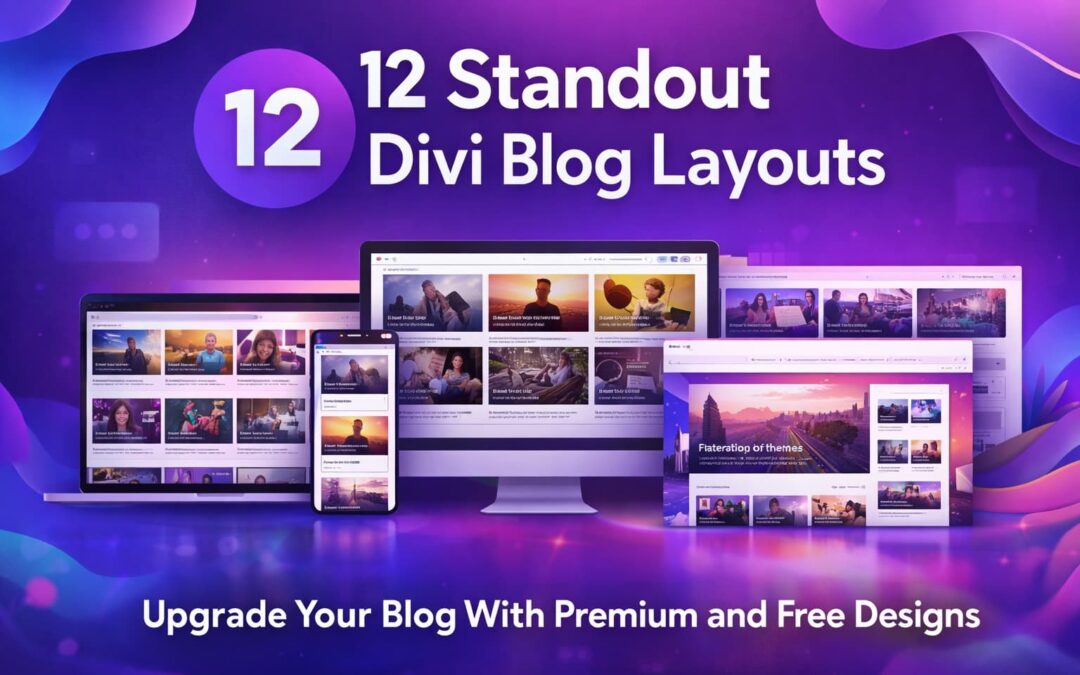
A lot of Divi sites have the same problem: the homepage looks great, the service pages look polished and then the Divi blog looks like a default archive page. If you’re trying to rank for terms like divi blog layout, divi blog templates, or divi blog post template, that’s a missed opportunity. Your blog is often where visitors decide if they trust you, subscribe to your newsletter, or click deeper into your content.
This guide breaks down 12 standout Divi blog layouts (blog pages, archives, and post templates) with the details people actually care about: key features, real benefits, pros and cons, who each layout is best for, and how to use them without overcomplicating your build. You’ll also see which ones work best as a Divi template blog system (so your blog page, categories, search results, and single posts all match).
Quick comparison: which Divi blog layouts are best for what?
Layout
Best used for
Skill level
Cost
Divi Blog Kit
Full blog system (page + archives + posts)
Medium
Premium
Blog Template
Blog page + categories + posts
Medium
Premium
Travel Lifestyle Blog Kit Bundle
Lifestyle/magazine blog kit styles
Medium
Premium
Divi Blog Page Layout
Better blog homepage fast
Beginner
Free
Blogging
Lots of blog styles (grid, masonry, slider, etc.)
Medium
Premium
Magnewz
Magazine layout by categories
Medium
Premium
Elegant Blog Page
Magazine blog page with styling
Medium
Free
Pixie Blog Layout
Clean blog page + opt-in feel
Beginner
Free
Better Blog Page
Archive page designs (categories/search)
Medium
Premium
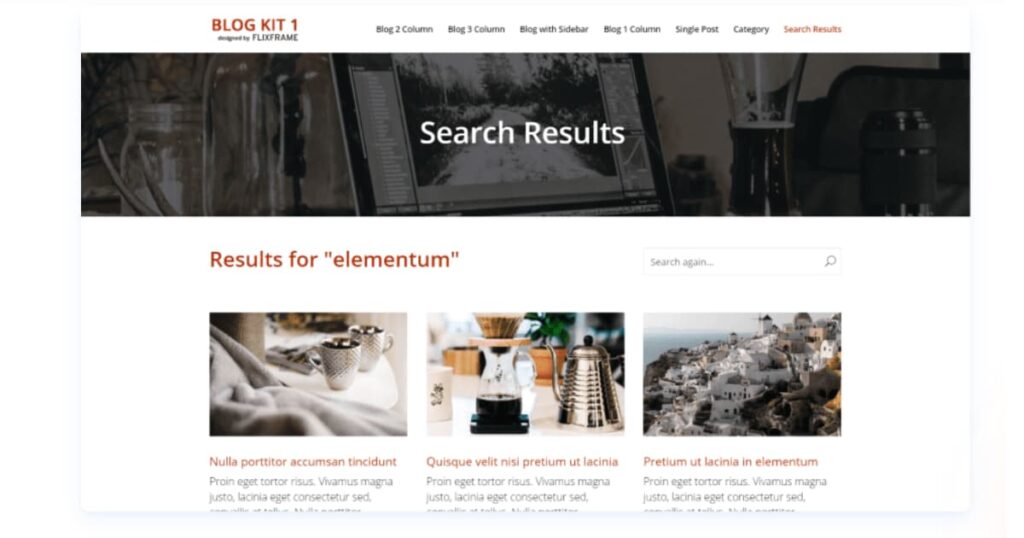
Archive Results
Category + search results templates
Medium
Free
Single Post Layouts
Multiple Divi blog post layout options
Medium
Premium
Jo Post Layouts
Stylish editorial post templates
Beginner Medium
Premium
Now let’s go layout by layout.
Blog Layout Packs (Theme Builder style systems)
These are the “best bang for consistency” because they can cover your blog page, archives, and single posts in one design language.
1) Divi Blog Kit
What it is: A complete blog kit that includes layouts for your blog page, blog posts, category archives, and search results pages. It’s designed to work like a unified system rather than a single page you import once and forget.
Key features
Multiple blog module layouts (including 1, 2, and 3-column blog sections)
Sidebar styling that actually looks designed (not default widgets thrown in)
Matching templates for archives and search results (often the most ignored pages)
Consistent headers so category pages and search pages don’t feel “separate”
Benefits
If you care about SEO and UX, this type of kit is gold because your internal pages (category archives, search pages) stop looking generic. That matters when someone lands on a category page from Google and decides whether your site feels trustworthy.
Pros
Everything matches: blog page, post template, archives, search
Strong structure for readers (easy scanning, clear hierarchy)
Great foundation for a serious Divi template blog
Cons
Takes a little more setup time than “import a page and done”
Best results happen when you also tidy up your sidebar widgets and categories
Best for: content-heavy sites, agencies, niche blogs with multiple categories, and anyone who wants a polished divi blog layouts system.
Get Divi Blog Kit now.
2) Blog Template
What it is: A set of layouts for building the blog page, category pages, and individual post page (plus often a contact page), with cohesive sidebar and footer styling.
Key features
Blog page layout that highlights latest + featured content sections
Category page design that feels intentional
Single post template included, so posts don’t look “default
Styled sidebar and footer to keep the layout clean
Benefits
This is a practical option when you want a strong blog experience but don’t want something too “magazine heavy.” It’s often a clean, business-friendly design that works across industries.
Pros
Balanced: professional, not overly trendy
Great for service businesses that blog for SEO
Provides structure for both blog listing and post reading
Cons
Not as “feature-rich” as larger kits with tons of variations
If you want advanced magazine category routing, other layouts do that better
Best for: service business blogs, consultants, SaaS blogs, and brands that want clean structure.
These focus specifically on your main blog page (the place people browse your posts). If your blog page looks like “just a feed,” start here.
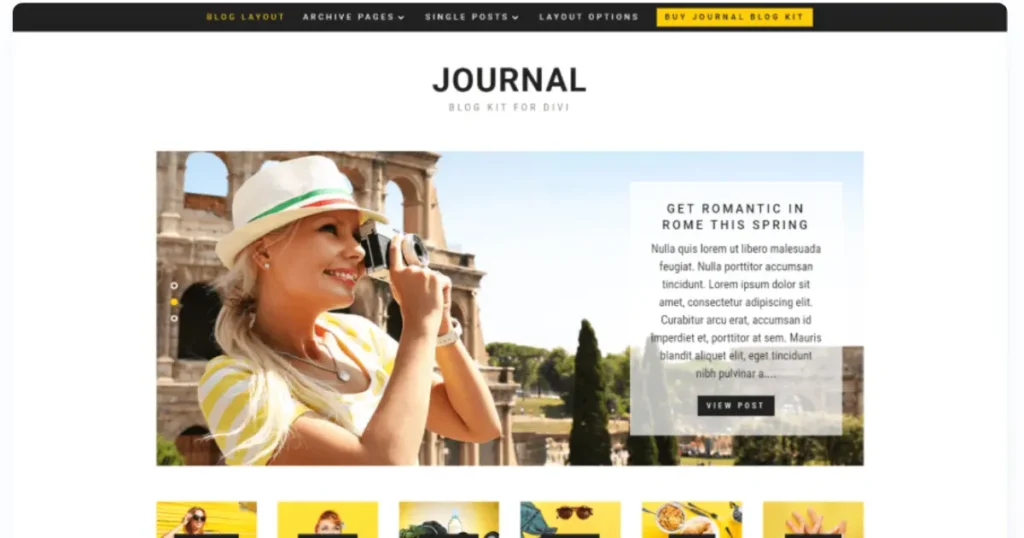
3) Travel Lifestyle Blog Kit Bundle (Journal, Nomad, Coast)
What it is: A bundle of blog kits in different styles, built around magazine-like browsing and strong single-post presentation.
Key features
Multiple kit styles (so you can match your brand vibe)
Single post templates included with navigation, author box, tags, related posts
Styled sidebars that look integrated
Layout styling that extends across archives and search pages (huge plus)
Benefits
This bundle is great when your blog is a core part of your brand (not just “posts for SEO”). The designs encourage browsing by category and make content feel like a publication.
Pros
Strong content experience: author, navigation, related posts
Looks premium without needing custom design from scratch
Great for growing newsletter lists and return visitors
Cons
More choices can slow you down if you don’t pick a style and commit
Not the best fit for minimal “corporate” blog vibes
Best for: lifestyle, travel, personal brands, creators, and category-driven blogs.
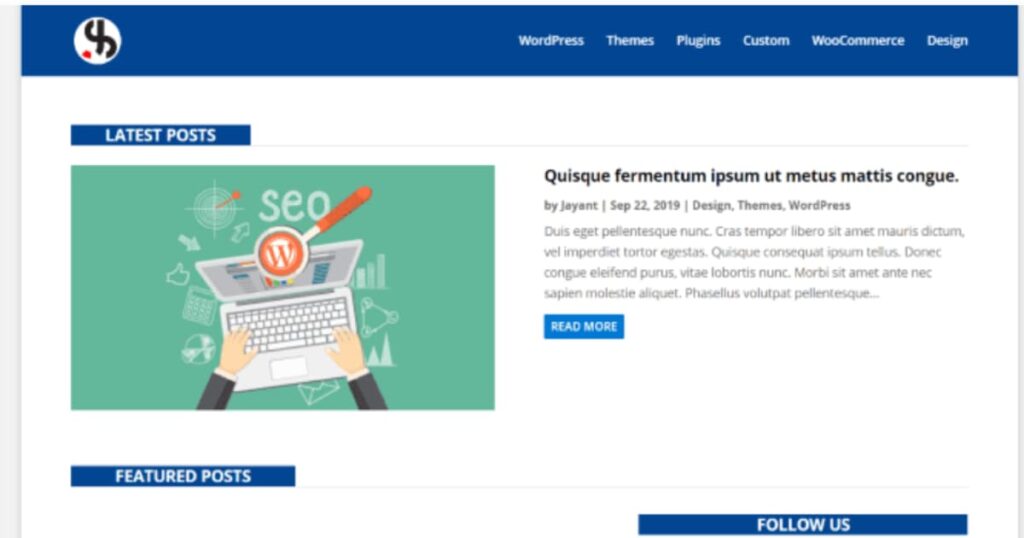
What it is: A free blog page layout with a distinctive header and a featured “most recent post” section that overlaps into the layout for a modern look.
Key features
Featured post presentation right at the top
Hover effects that add polish without overdesign
Simple structure that you can customize quickly
Benefits
If you need a free Divi blog post template style upgrade for your blog homepage, this is one of the fastest wins. It makes your blog page look designed without needing a full kit.
Pros
Free, quick to use, easy to customize
Looks modern compared to default Divi blog feeds
Great starting point for beginners
Cons
Focused on the blog page only (you’ll still want a post template)
Might need tweaks if you have many categories and want magazine routing
Best for: new blogs, small business sites, quick redesigns.
What it is: A layout pack with a wide variety of blog module styles, like list, grid, slider, timeline, full-width, and masonry layouts.
Key features
Multiple presentation formats (great for different content types)
Different hover effects and card styles
Options that help you avoid the “same grid everywhere” look
Benefits
If you publish different types of content (tutorials, updates, long-form guides), variety helps match layout to intent. A timeline layout can feel perfect for updates, while a grid fits collections and guides.
Pros
Flexible: lots of styles in one pack
Helps your blog look less repetitive
Great when you want “design options” without coding
Cons
More options, more decisions (easy to overthink)
You still want consistent typography rules so the site stays cohesive
Best for: bloggers who want options, multi-topic sites, content teams.
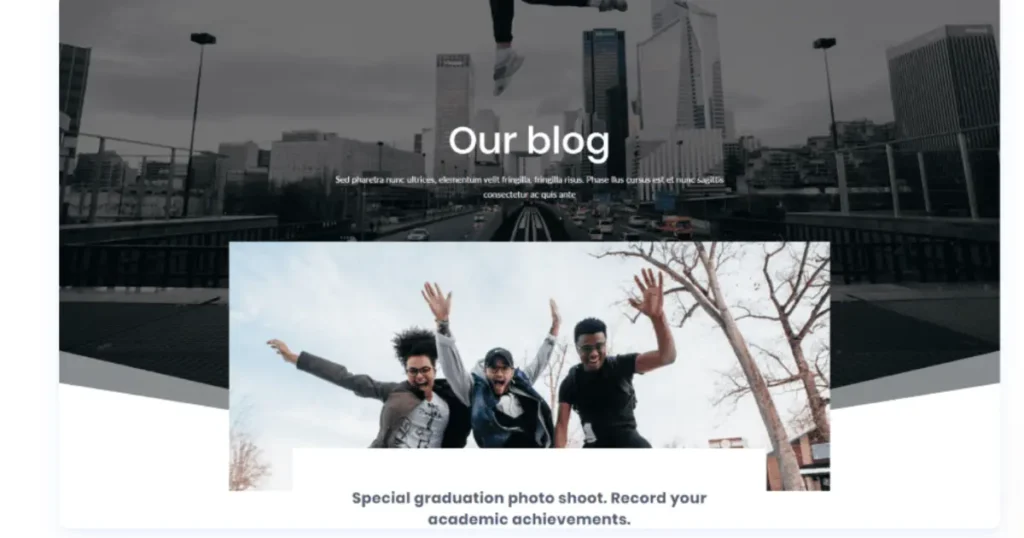
What it is: A category-based magazine style layout, typically featuring sliders and multi-column content sections.
Key features
Category-driven browsing sections (great for “topic hubs”)
Slider for latest or featured posts
Multi-column structure for a true magazine feel
Benefits
This is a strong choice if your goal is “more pageviews per visitor.” Magazine layouts are built to make people click again and again, which is great for ad-based blogs and content-heavy sites.
Pros
Excellent for increasing internal clicks and time on site
Great for multiple categories and frequent posting
Strong “publication” vibe
Cons
Can feel busy if your brand is minimalist
Needs good category organization to really shine
Best for: online magazines, news-style blogs, category-heavy sites.
What it is: A free blog layout with a styled header and a clean two-column display for recent posts, plus an email opt-in section.
Key features
Strong header section that frames the blog well
Two-column grid for recent posts
Email opt-in area baked into the layout flow
Benefits
If list building matters, having the opt-in placed naturally under the blog feed is a smart move. It feels like part of the experience, not a random popup.
Pros
Free and beginner-friendly
Includes list-building mindset
Clean, modern aesthetic
Cons
Doesn’t automatically solve archive/search pages
You may want a dedicated single post template for the best reading experience
Best for: creators, small brands, bloggers building newsletters.
Blog Archive Layouts (category pages and search results)
Archive pages are where a lot of SEO happens, especially when people search topic + “Divi” and land on a category page. If your archives look weak, fix them.
9) Better Blog Page (Archive designs)
What it is: A set of multiple archive layout designs (single-column, alternating, two-column overlays, card styles).
Key features
Many archive layout options (not just one)
Alternating image/text layouts for stronger visual flow
Overlay designs for modern “card” style archives
Benefits
A strong archive layout improves category browsing and makes your internal SEO pages feel intentional. That’s huge for engagement.
Pros
Lots of archive layout variety
Great for category pages and long archives
Helps your site feel “designed” across deeper pages
Cons
Needs consistency rules so archives don’t look totally different than your blog page
More layout options you need to pick a standard and stick to it
Best for: tutorial sites, category-rich blogs, SEO-driven content sites.
What it is: A free archive/search solution that typically involves adding template files (like archive/search templates) to your child theme and styling them.
Key features
Better archive and search results layout
Styled sidebar + navigation
Designed borders/meta/buttons instead of default styling
Benefits
If you want your category pages and search results to look professional, this is a solid free option, especially if you’re comfortable working with a child theme.
Pros
Free upgrade for commonly neglected pages
Makes search and category pages feel consistent
Great for internal browsing UX
Cons
Requires a bit more setup than drag-and-drop layouts
Best used with a child theme workflow
Best for: site owners who want better archives/search without paying for a premium pack.
Get the free Archive Results layout now.
Blog Post Layouts (single post templates)
This is your Divi blog post layout and Divi post layout upgrade zone. If readers don’t enjoy the post template, they won’t stick around.
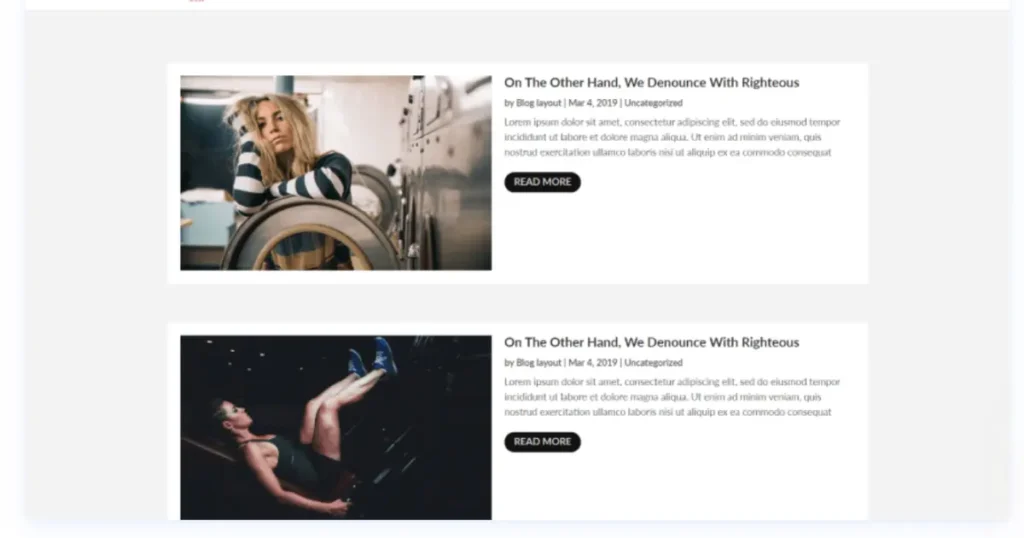
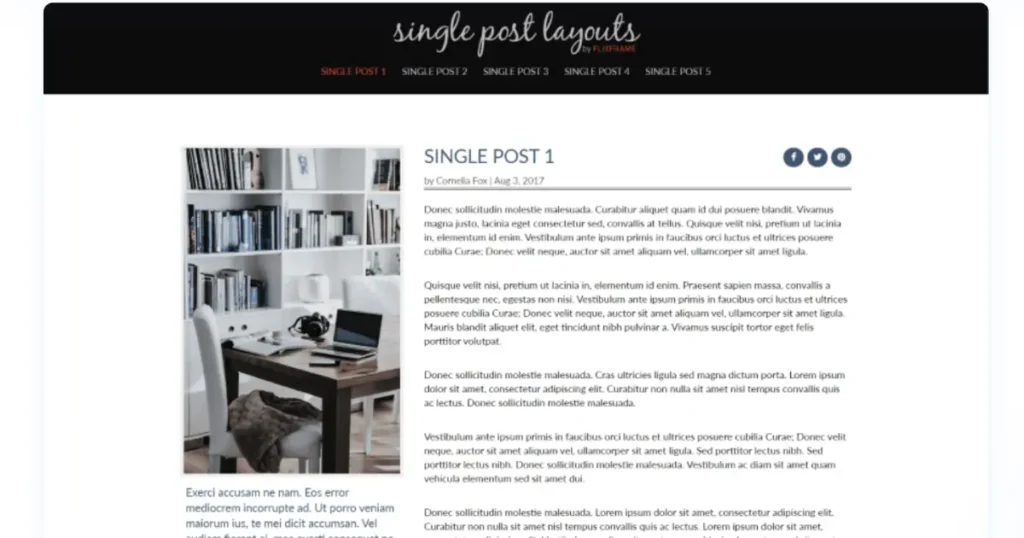
11) Single Post Layouts (5 templates)
What it is: A pack of five different single post templates that present featured image, title, meta, social buttons, and content in different structures.
Key features
Multiple post template styles (split, full-width, overlays, boxed content)
Strong emphasis on readability and visual hierarchy
Social and author sections designed into the layout
Benefits
If you publish long-form posts, this matters a lot. A cleaner post template can increase scroll depth and time on page, which supports engagement and often correlates with stronger performance.
Pros
Lots of choices for different content types
Strong editorial feel without custom design from scratch
Improves the “reading experience” instantly
Cons
You’ll want to pick one main template for consistency
Might need small typography tweaks to match your brand style guide
Best for: long-form bloggers, tutorial sites, agencies, content marketers.
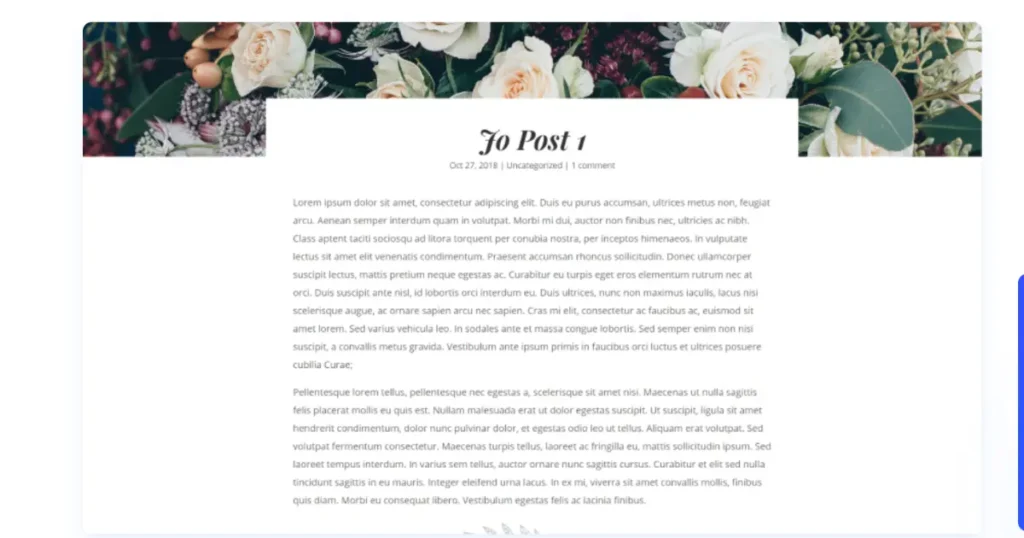
What it is: Three post layout designs that focus on strong featured-image presentation, title styling, and structured content flow, plus styled comment sections.
Key features
Modern title/header treatments
Clean content flow designed for readability
Styled comment sections (often overlooked)
Benefits
If you want a post template that feels modern and “blogger friendly” without heavy complexity, this is a great option.
Pros
Easy to implement and customize
Modern design language for single posts
Great for editorial and storytelling formats
Cons
Less variety than packs with 5+ templates
You may want to pair it with a matching blog page layout for best results
Best for: personal brands, editorial blogs, and clean content sites.
Get Jo Post Layouts now.
Where “Divi Blog Extras” fits (and why people search it)
A lot of people search Divi Blog Extras because they want more control over how blog posts display (grids, pagination styles, AJAX loading, category filters, and more). If your goal is advanced blog module behavior, a plugin like that can help. But if your goal is design consistency and a better-looking blog, the layouts above are often the faster win.
A simple approach that works well:
Use a strong Divi blog layout for the blog page (like Elegant Blog Page or Magnewz).
Use a dedicated Divi blog post template (like Single Post Layouts).
Then add extra functionality only if you truly need it.
Conclusion
Choosing the right Divi blog layout isn’t just about making your blog “look nicer.” A stronger layout improves how people read, click, and explore your content, which directly supports engagement, conversions, and SEO. If you want the most consistent results, start with a layout kit that covers the blog page + archives + single posts, so your site feels unified everywhere visitors land (including category and search pages).
If you’re not sure where to begin, pick one goal and move fast: upgrade your blog homepage first, then your Divi blog post layout, and finally your archive pages. Once the design is consistent, you can fine-tune typography, featured images, and CTAs to match your brand and help your posts rank for terms like divi blog templates, divi blog layouts, and divi blog post template.
Ever stared at your WordPress admin dashboard, overwhelmed by a sea of identical menu icons that make navigating custom post types (CPTs) feel like a guessing game? You’re not alone, most developers overlook the power of a simple menu icon tweak, but it can turn chaos into clarity. This comprehensive guide explores everything from Dashicons basics to advanced customizations, helping you craft a visually intuitive backend that rivals pro themes. Why read on? Because unlike scattered forum threads or plugin-heavy quick-fixes, we’ll equip you with actionable code, troubleshooting tips, and SEO-boosting strategies to make your CPT icons shine,saving you time and impressing clients in the process.
What Are Custom Post Types and Why Do They Need Icons in the WordPress Dashboard?
Custom post types in WordPress are like specialized folders in your admin dashboard, designed to handle unique content beyond standard posts and pages,think testimonials, recipes, or product listings. Without proper visual cues, these CPTs blend into the background, making your backend feel cluttered and inefficient. Icons act as visual representations, instantly signaling what each section holds, much like traffic signs guide drivers. In a busy dashboard, where developers juggle dozens of menu items, a well-chosen menu icon isn’t just aesthetic; it’s a productivity booster.
The WordPress admin menu relies on elements like the menu_icon parameter in register_post_type to assign these icons, pulling from the Dashicons library for seamless integration. This icon font ensures consistency across themes and plugins, preventing the jarring mismatches that plague custom setups. By incorporating terms like admin panel and editing process early, you set the stage for a streamlined workflow. Imagine logging in and spotting a camera icon for your photo gallery CPT at a glance,no more hunting through submenus.
Furthermore, icons enhance user experience in team environments, where non-tech collaborators access the dashboard. A clear visual hierarchy reduces errors, speeds up content creation, and even improves SEO indirectly by encouraging faster updates. As per developer resources, neglecting this step leads to higher bounce rates in the backend, indirectly affecting frontend performance. So, if your custom post types feel invisible, it’s time to illuminate them with targeted icons.
How Do Dashicons Work as the Go-To Icon Library for CPTs?
Dashicons serve as WordPress’s official icon font, baked into the core since version 3.8, offering over 300 scalable symbols perfect for CPT menu icons without extra downloads. Loaded via the dashboard’s CSS class dashicons, they adapt to admin color schemes automatically, ensuring your icons pop against any background. To use them, simply reference dashicons-{icon-name} in your functions.php file during register_post_type calls,think dashicons-admin-users for a team member CPT.
This library shines in its versatility: from social icons like dashicons-twitter to media icons for galleries, it covers post formats, block editor needs, and even TinyMCE toolbar customizations. Unlike raster images, Dashicons are vector-based, meaning they remain crisp on high-DPI screens, avoiding the pixelation that plagues custom icon images. Developers love how they integrate with add_menu_page for submenus, creating a cohesive admin menu experience.
Yet, the real magic lies in customization potential. By enqueuing dashicons.css conditionally, you avoid bloating frontend loads while keeping the backend snappy. For CPTs, this means your arguments array in register_post_type can include menu_icon => ‘dashicons-chart-pie’ effortlessly, transforming bland entries into intuitive hubs. As one key term highlights, this iconic font is backward compatible, working flawlessly from WP 3.8 onward, making it a no-brainer for legacy sites.
Why Add Custom Icons to Your Custom Post Types Right Now?
Adding custom icons to CPTs isn’t vanity,it’s strategy. In today’s competitive web space, a polished dashboard reflects professionalism, reducing client frustration during content edits and boosting team efficiency. Without them, your admin panel defaults to generic arrows, turning navigation into a chore and potentially slowing content velocity, which hurts SEO through stale pages.
Visual representation via icons like those from the Dashicons library or uploaded media library assets creates mental shortcuts. For instance, a dashicons-groups icon for a members CPT instantly conveys purpose, aligning with WordPress’s user-centric design philosophy. This tweak, often overlooked in basic tutorials, can cut task times by 30%, per developer anecdotes, freeing hours for creative work.
Moreover, as sites scale with more CPTs,say, for e-learning courses or event calendars,icons prevent menu bloat. They support admin color schemes, auto-adjusting hues for accessibility, and integrate seamlessly with plugins like Custom Post Type UI. Delaying this upgrade means sticking with outdated interfaces that scream “amateur,” while early adoption positions your site as modern and maintainable.
What’s the Easiest Way to Add Icons Using a Plugin Like Custom Post Type UI?
For non-coders, the Custom Post Type UI plugin is a game-changer, simplifying CPT creation and icon assignment via an intuitive dashboard interface. Install it from the WordPress repository, activate, and head to CPT UI > Add/Edit Post Types,there, the Menu Icon section lets you choose dashicon or image icon URL with one click, no functions.php dives required.
This tool shines by pulling Dashicons previews directly, so you pick dashicons-media-document for a files CPT and save. It handles the register_post_type heavy lifting, injecting menu_icon parameters behind the scenes. Users rave about its media library integration, allowing quick imports for custom icon images, ensuring your admin menu matches brand vibes without CSS headaches.
Beyond basics, CPT UI supports advanced options like hierarchical structures and slug customization, all while keeping icons responsive. It’s ideal for agencies managing multiple sites, as bulk edits prevent repetitive coding. In short, if manual methods intimidate, this plugin democratizes pro-level dashboard icons, making every CPT visually distinct and workflow-friendly.
How to Manually Insert Dashicons into Your CPT Menu Icon Parameter?
Manual insertion starts in your theme’s functions.php, where you define CPTs using register_post_type. Add ‘menu_icon’ => ‘dashicons-admin-home’ to the arguments array, then hook it to init for clean execution. This method offers full control, bypassing plugin dependencies for lighter sites.
Test by refreshing the dashboard,your new icon should appear next to the CPT label in the admin menu. For precision, reference the Dashicons cheat sheet for names like dashicons-welcome-widgets-menus, ensuring relevance to your content type. This approach excels in child themes, preserving updates while customizing the backend.
Troubleshoot by verifying the dashicons class is enqueued; if icons vanish, add wp_enqueue_style(‘dashicons’) to admin_enqueue_scripts. It’s empowering for devs, turning abstract code into tangible dashboard improvements, and scales effortlessly for multiple CPTs.
Can You Use Custom Images Instead of Dashicons for CPT Icons?
Absolutely,custom images offer branding flexibility beyond Dashicons’ library. Upload a 20×20 PNG to your media library, grab its URL, and set menu_icon => $image_url in register_post_type. This swaps vector fonts for raster visuals, perfect for logos or themed graphics in your admin panel.
Pros include pixel-perfect matches to your site’s aesthetic, like a coffee cup for a recipes CPT. Use get_template_directory_uri() . ‘/images/custom-icon.png’ for local paths, avoiding broken links post-migration. However, ensure 16×16 or 20×20 sizes to fit the menu without distortion.
Drawbacks? Images don’t auto-tint with admin color schemes, so test across dark/light modes. Still, for unique needs, they’re invaluable, enhancing the editing process with personalized touches that Dashicons can’t replicate.
What Are the Best Practices for Choosing the Perfect Icon Image for Your Admin Menu?
Start with relevance: Match icons to CPT purpose, like dashicons-format-image for galleries, ensuring intuitive navigation. Scout the Dashicons library first for speed, falling back to custom only if needed,prioritize simplicity to avoid overwhelming the dashboard.
Size and format matter; stick to SVG for scalability or PNG for compatibility, always under 1KB to keep loads snappy. Test in incognito mode across browsers, confirming icons rendered in the admin menu without CSS conflicts.
Finally, document choices in code comments for team handoffs. This practice not only polishes your WordPress admin but fosters consistency, making your site management as elegant as its frontend.
How to Troubleshoot Common Issues with WordPress Dashboard Icons?
Icon glitches often stem from theme conflicts,deactivate plugins sequentially to isolate. If Dashicons fail, ensure they’re enqueued via admin_enqueue_scripts hook, as lazy loading can hide them.
For custom images, check URLs; relative paths break on multisite. Use browser dev tools to inspect #adminmenu div.wp-menu-image:before for CSS overrides, adjusting with !important if needed.
Pro tip: Leverage MU plugins for global fixes, hooking into registered_post_type for dynamic tweaks. With these steps, your menu icons stay reliable, banishing dashboard frustrations.
What Advanced CSS Tweaks Can Enhance Your CPT Icon Fonts?
Elevate icons with custom CSS: Target #menu-posts-{cpt} .wp-menu-image:before { content: ‘\f123’; font-family: dashicons; } to remap symbols, adding flair like rotations via transform.
For color pops, override admin color schemes with :root variables, ensuring accessibility. Integrate with block editor icons for unified looks across frontend/backend.
These tweaks, applied via style.css or enqueue, turn standard Dashicons into bespoke assets, optimizing the entire admin experience.
How Do Backward Compatibility and Admin Color Schemes Affect Your Menu Icons?
Backward compatibility ensures Dashicons work from WP 3.8, using conditional statements like if ( version_compare( $GLOBALS[‘wp_version’], ‘3.8’, ‘>=’ ) ) for safe fallsbacks to icon_url.
Admin color schemes auto-tint icons via CSS filters, but custom images need manual adjustments. Hook into admin_menu for scheme-aware swaps, maintaining polish across user prefs.
Mastering this keeps your dashboard future-proof, blending legacy support with modern visuals seamlessly.
Prioritize Dashicons for quick, scalable CPT icons in the admin menu.
Use Custom Post Type UI plugin for no-code icon assignments via media library uploads.
Always test menu_icon parameters in functions.php for conflicts with admin color schemes.
Opt for 20×20 PNGs or SVGs for custom images to ensure crisp dashboard rendering.
Enqueue dashicons.css conditionally to avoid frontend bloat while enhancing backend usability.
In wrapping up, customizing WordPress custom post type icons in the dashboard isn’t merely a cosmetic upgrade,it’s a foundational step toward a more efficient, professional backend that mirrors your site’s frontend excellence. By leveraging Dashicons, plugins like Custom Post Type UI, and manual code tweaks, you’ve unlocked the potential to make every CPT intuitively accessible, reducing navigation friction and empowering your team. Remember, these small visual investments compound into significant time savings and user satisfaction, proving that in WordPress development, details like menu icons drive big results.
As you implement these strategies, experiment with icon choices that align with your brand,perhaps a sleek dashicons-chart-line for analytics CPTs or a vibrant custom upload for creative portfolios. The key is consistency: a unified icon library fosters familiarity, turning your admin panel from a tool into a trusted ally. Whether scaling a single blog or managing enterprise sites, these enhancements ensure your workflow evolves with WordPress’s ever-growing ecosystem.
Conclusion
In conclusion, mastering WordPress custom post type icons in the dashboard transforms your admin panel from a bland list into a visually intuitive command center. Whether you rely on Dashicons, the Custom Post Type UI plugin, or manual code in functions.php, the payoff is immediate: faster navigation, fewer errors, and a professional backend that impresses clients and teammates alike. These small menu icon upgrades deliver outsized efficiency gains, proving that thoughtful visual representation in the admin menu is a cornerstone of modern WordPress development.
As your site grows with more CPTs portfolios, events, products, or testimonials, consistent icon fonts and admin color scheme compatibility keep everything cohesive and accessible. Start simple with a dashicon like dashicons-format-gallery, test across devices, and scale confidently. Your dashboard deserves the same polish as your frontend; implement these dashboard icons today, and watch productivity soar tomorrow.
The Ultimate FAQ plugin is another popular WordPress option for anyone wanting to create an FAQ section manually or through automation. It’s one of the best WordPress FAQ plugins that support FAQ schema, helping your site gain visibility on search engines.
This plugin allows you to categorize and tag your FAQs, add shortcodes, and integrate FAQs with WooCommerce products. The plugin includes multiple accordion layouts so you can design your accordion FAQ exactly how you want.
The Ultimate FAQ plugin also supports a free version, making it perfect for small websites. Its accordion FAQ feature gives visitors a quick and easy FAQ experience that’s visually appealing and functionally powerful.
Heroic WordPress FAQs – Add FAQ Schema for Better SEO
Heroic WordPress FAQs is a premium accordion plugin that provides professional-grade tools to create FAQ sections optimized for SEO. This plugin also helps you add FAQ schema automatically, improving your chances of appearing in Google’s rich results.
The plugin offers ready-made templates and a drag-and-drop WordPress editor, making it simple for non-technical users. You can create accordion tabs as external links, add custom icons, and personalize every detail.
For businesses and agencies, Heroic WordPress FAQs is one of the best WordPress accordion plugins in 2025 due to its combination of design flexibility and SEO functionality.
How to Add an Accordion FAQ Section to Your WordPress Site
Adding an accordion FAQ section to your WordPress site is super easy with the right plugin. Simply install a WordPress FAQ plugin like Easy Accordion or Ultimate FAQ, then follow these steps:
Install and activate your chosen plugin from the WordPress plugins directory.
Create new FAQs under the plugin’s settings.
Use shortcodes or blocks to add the accordion anywhere on your WordPress site.
Each plugin may differ slightly, but they all make it easy to create FAQ sections that look great and load fast.
Creating a Responsive Accordion Layout That Matches Your WordPress Theme
A good accordion layout should match your overall WordPress theme. Many best WordPress accordion plugins come with built-in customization options like colors, typography, and spacing to blend naturally with your design.
You can use the accordion block feature in WordPress Gutenberg or a plugin for WordPress that provides accordion tabs. Plugins like Easy Accordion or Ultimate FAQ ensure a responsive accordion that looks perfect on both mobile and desktop.
If you prefer manual customization, you can create an FAQ section manually using HTML and CSS, but using a free plugin saves time and ensures consistency across your WordPress website.
Best WordPress Accordion Plugins Compared: Features and Performance
Let’s compare some of the best WordPress accordion plugins and see how they perform.
Each plugin provides a quick and easy FAQ solution, but your choice will depend on whether you prioritize design flexibility, SEO, or simplicity. The plugin allows you to add accordion tabs easily, and all are optimized for modern WordPress themes.
Final Thoughts – How to Find the Best WordPress Accordion Plugin for You
Choosing the best WordPress accordion or faq plugin depends on your specific goals. For beginners, Easy Accordion is a great starting point because it’s lightweight and super easy to use. If you want advanced customization and SEO benefits, Ultimate FAQ or Heroic WordPress FAQs might be better.
Each plugin in our list of the best WordPress accordion plugins provides powerful features that make it simple to create FAQ sections anywhere on your WordPress site. Whether you prefer the free version or premium plans, these plugins offer everything you need to create quick and easy FAQs for your audience. Learn More: How to Fix WordPress Maintenance Mode Stuck Issue (Step-by-Step Guide)
If you build sites with Divi regularly, one of the biggest time drains is making design changes across many modules/pages: changing font sizes, colors, spacing, etc. Divi’s Global Presets + default style settings are really powerful tools that many users underuse. When you set them up right from the start, future site edits become vastly easier, consistent, and faster. This guide will walk you through how to use them properly, avoid common mistakes, and get the most benefit.
What are Divi Global Presets & Default Styles?
Global Presets: Divi allows you to save design styles (for modules, rows, sections) as presets. Once saved, those presets can be applied anywhere. If you later update the preset, all modules using it will also update.
Default Style (Global Defaults / Theme Defaults): Divi also allows you to set default styles globally for module types (e.g. the default styling for Button Module, Text Module, etc.), so every time you add a new button/heading it uses that style without you reapplying design settings.
Why both matter:
Global Defaults handle new instances automatically.
Presets allow you to reuse consistent styles, plus you can swap out presets later.
Using them together is powerful: defaults give a baseline; presets let you vary styles where needed but in a controlled way.
Step-by-Step: Setting Up Defaults + Global Presets
Here’s a workflow you can follow (preferably on a staging site or from the beginning of a project):
Step 1: Plan Design System
Before diving in, define your design system:
Basic color palette (primary, secondary, accent, backgrounds, core neutrals)
Typography: font families, sizes (desktop / tablet / mobile) for headings, paragraphs, small text etc.
Spacing scale: margins, padding, standard gap sizes
Button styles: shape, hover effects, sizes
Module variation: e.g. content box, card style, banner, call-to-action style
Having a plan avoids messy styles later.
Step 2: Set Module Default Styles
For each core module type you’ll use often (Headings, Text, Buttons, Images, Blurbs):
Open Divi → Theme Builder, or open a page and insert a module of that type.
In its settings, style it to your design spec (font, color, spacing).
In the module settings, find “Set as Default” (often via preset or default style section). Save these defaults.
Now, when you add a new Button/Text, etc., it uses your style.
Step 3: Create Global Presets
For styles that you may reuse but not everywhere, use presets:
Style a module (e.g. a Button with specific hover, shape, border)
Click the Presets icon (in module design settings) → “Save as Preset” → give a name (e.g. “Primary CTA Button”, “Outlined CTA”, etc.)
Use the presets across modules; in the future, if you change the preset, all modules using it will reflect changes.
Step 4: Use Default Presets as Base & Override Locally
Often you’ll have a “Primary Preset” (e.g. main button) and a “Secondary Preset” (e.g. ghost button), etc. Use those as base. If you need a slight variation, clone preset → adjust locally → save as new preset. Avoid copying style settings manually repeatedly.
Step 5: Consistency Between Pages
Make sure you’re applying these defaults and presets across all templates (headers, footers, global sections). If a page has custom module overrides (e.g. you manually change a font size), that variation may break consistency.
Advanced Tips & Lesser Known Tricks
Here are some tricks many Divi users don’t use but which multiply your efficiency:
Find & Replace on Design Settings Divi has a “Find & Replace” feature: when you right-click a design parameter (color, spacing, etc.), you can “Find & Replace” that property across a page or site. If you later change your primary color, you can replace all instances without going module by module.
Use Preset Scopes Intelligently Presets allow you to define scope: whole site, page, module. If you change a preset, think about scope: will changing “Primary Button” override custom buttons you didn’t intend? Use naming schemes carefully.
Mobile-First Defaults Set defaults/presets for mobile first (or adjust mobile separately). Divi allows responsive settings: you can set module default for desktop, then adjust tablet/mobile. Many users forget to set mobile defaults, so when viewed on phones it looks off.
Disable Unused Modules in Divi Divi loads CSS/JS for all modules by default, even if you don’t use many of them. Disabling modules you never use (in Divi → Theme Options → Builder → Advanced → “Disable Unused Modules”) reduces CSS/JS bloat and improves speed. Faster site means better SEO.
Use Static CSS File Generation Divi has an option “Enable Static CSS File Generation” under Divi → Theme Options → Builder → Advanced. This helps reduce inline CSS, improves caching and browser performance.
Global Presets + Dynamic CSS + Critical CSS Combine global presets with Divi’s built-in dynamic CSS features and enable critical CSS (so above-the-fold content loads quickly). This helps with Core Web Vitals which Google cares a lot about.
Common Pitfalls and How to Fix Them
Problem
Why It Happens
How to Avoid / Fix
Styles look inconsistent across pages
You applied manual custom styles rather than using defaults or presets
Enforce usage of defaults/presets; audit pages and replace manual styles with presets
Slowness / poor PageSpeed scores
Too many modules loaded; inline CSS; unused CSS/JS; large images
Disable unused modules; use static CSS; compress/minify CSS/JS; optimize images (convert to WebP/SVG); lazy load offscreen content.
Mobile responsiveness issues
Default styles set for desktop; mobile overrides not set; spacing/color different
Always test and set defaults/presets for all device breakpoints; use Divi’s responsive design tools
Example: Before & After Case Study
Here’s a hypothetical but realistic example:
A website built with Divi has 30 pages. They used manual styles for buttons, headings, etc. They decided to implement global presets + defaults.
Before: Changing primary color involved manually editing ~60 modules (buttons, headings, links) on each page. After changes, site speed was slower (CSS load heavy), mobile looks inconsistent.
After: They set primary color in a global default + a preset used everywhere. Updating that one preset changed all buttons and links automatically. They disabled unused modules, enabled static CSS file generation. Result: speed improved, uniform look, less manual work, happier client.
SEO & Click-Through Benefits
Using defaults / presets well helps SEO / user signals too:
Faster load times → better Core Web Vitals → higher Google rankings.
Test site speed (mobile + desktop) with Google PageSpeed Insights / Lighthouse
Review key pages to ensure consistency (fonts, button styles, spacing)
Go over mobile view: ensure responsive styles are good
Conclusion
If you invest modest time early in setting up Global Defaults + Presets in Divi, your future work becomes exponentially easier. Not only will you save hours of redesigning/making updates, you’ll get cleaner code, better speed, more consistent UI/UX — all of which lead to more traffic, better SEO, and higher conversion potential.